Wednesday 17 October 2007

Ceramic Buttons, Fundraisers & an Interview

Cynthia Guajardo Porcelain Buttons
Porcelain Buttons

This past weekend was a busy one! In addition to running on an ING Marathon Relay team, I participated in a small craft fair at my daughter's school on Sunday afternoon. It was the school's annual Fall Carnival - one of several annual school fund raising events and the kid's favorite. It's normally held outside; however, this year we awoke to freezing rain and temps in the high 30's. Needless to say the event was held inside which was actually quite fun - though noisy.

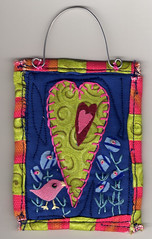
I brought my ceramic jewelry and buttons to the event. After running that morning, I had no desire to lug my pottery over to the school. As it turns out, the jewelry was the perfect choice. I sold a little bit, with 20% of the proceeds going back to the school. There were other Moms/crafters selling a variety of items including handmade balms, felted purses, sewn purses and belts, jewelry, cards, kid's art smocks and little dolls. I sold the buttons (above) to the woman making sewn purses and belts and she ordered 5 more custom buttons to use in her creations. I purchased some organic lip balm from Tulip's Balms who began making organic creams and balms for her son. It's fabulous and a product I highly recommend.

Meanwhile, did I mention that I ran the first leg of the Denver Marathon - 6 miles in the freezing rain and cold? I wouldn't have chosen to run in the rain, but you get what you get on race day. I ran strong (for me), 6 miles in 1:05. While that is a sub 11 minute mile, it's much faster than my leisurely 12-13 minute miles I run with the ladies in my training group! We're a chatty group and very social - not hard core running machines. Instead of talking about fartleks, interval training, carbo-loading, favorite sports gels etc., we talk about the newest cupcake shop or Italian restaurant to open. We share stories about work, family, and favorite recipes. It makes those 2 hours Saturday training runs go so much faster! My training season is over now, and I now go into maintenance mode - solo runs 4 days a week. I plug in my iPod and veg out to the latest Craftcast.

Unfortunately, I don't have any photos to share right now. I did feel special, however, because I was running with 3 ING executives and got to go in the VIP tent - I even saw some of the elite runners! That's always amazing. ING is the title sponsor for the next 5 years, so there was quite an ING presence. Our team finished the marathon in 4:03 - not too bad for 3 execs and a middle aged woman. I was the slowest person on the team. Since I was running with the big guys, I had company from the ING New York employee, Chris Solarz and his fiancee, who doubled as official ING marathon photographer. There should be a slide show coming soon to the ING website. I'll post a link when it becomes available.

Oh, I almost forgot, Nancy Van Blaricom asked if she could interview lil' ole me for her blog a few weeks ago and you can read about what we talked about on her site. Thanks Nancy!

That's it for today - I must go tend to my glaze firing now,

~Cynthia

Blog
Website

Tuesday 9 October 2007

Double Walled Salt Shaker and Good News!


Double walled salt shaker with no holes

Double walled holeless salt shaker
Bottom of double walled salt shaker

A couple of weeks ago, the Etsy Mud Team, (an Etsy group that I belong to) was discussing double walled holeless salt shakers. I really couldn't fathom how they were made or worked, but gave it a good shot after seeing Keith's tutorial. I didn't do any before, during and after photos and instead, opted to wait and see if my creation even survived the bisque fire.

It did. I ended up adding the decorative knob, because without it, frankly the salt shaker looked like a female body part. Please use your imagination here.... As to the mechanics of the piece, one basically fills the salt or pepper into the hole in the bottom. To use, the salt sits within the "walls" until shaken, then sprinkles from the hollow center. Makes sense, right? I'm a visual person, and didn't get it until I made one myself. I think it needs a pepper partner now.


Bisqued porcelain bottle with handmade ginkgo lino-cut stamps - not yet glazed

Then, I water etched another vase, but decided to use my ginkgo stamp on the bottle. The fat juicy body of the piece, just begged for some kind of adornment. I still need to glaze these pieces, and was going to do so tonight, but one of my favorite shows is on in 5 minutes. I have another true confession - I love the medical drama, House.

Oh yah, I almost forgot about the good news. Before the new school year began, I proposed an after school clay class at my daughter's school. It's finally wound it's way through the ranks and has formally been approved. I begin teaching the last week in October. I can't wait!

Happy Wednesday everyone,

~Cynthia

Blog
Website

Sunday 2 September 2007

Portable Photographic Light Box

Photographic Light Box
Portable Light Box

Photographic light box
Side View

Like many other independent artisans, I need professional photographs so that I can share my work with you on my blog, website, Etsy and other retail venues. What happens when one can't afford to hire a professional photographer? If you're like me, you scour the Internet for information - free information!

A few years ago, I did invest in a seamless graduated photographic background paper that is pretty standard when photographing ceramic work. This method is my first choice when I need to do a large photoshoot, however, it has its drawbacks. I do not have special lights or even a designated space for photographing work in my studio or home. I photograph work outside - but have to wait for an overcast day to do have a photoshoot to avoid having blue undertones to my photographs.

Last fall, after searching the Internet for the best way to photograph small objects indoors or out, I found Strobist - a fantastic photographic how to blog that gave step by step instructions for constructing a low cost macro photo studio. About 3 weeks ago, I decided to construct one using a recycled USPS shipping box, tracing paper, packing tape and a portion of a piece of quality drawing paper.

It works pretty well in direct sunlight - though I imagine that I will also be able to use it inside too when the weather gets cooler. I've read somewhere that I can use Reveal light bulbs as my light source if I do use it inside in the future. I'm still trying to get the hang of it, and do end up having to make some minor adjustment in Photoshop. If you don't have Photoshop or similar program, Google's Picassa is a FREE download that offers storage and photo-editing software for anyone to use.
Cynthia Guajardo Ginkgo Mug
Porcelain ginkgo mug photographed in the DIY light box


Bacaware Jewelry and Supplies
This photo was also taken using my homemade light box

Meanwhile, I think I mentioned that my friend, Mary Cay and I went into business together. We purchased a huge lot of jewelry supplies and findings from one of her friends and have slowly begun the process of inventorying all of the bounty. We are going through all the items that we each want to keep for our own use and then are selling finished jewelry and supplies that we'll never use in our lifetime. Check out our Etsy Shop if you're a jewelry designer and are in need of affordable supplies. We haven't listed much, but will be adding more and more until it's all gone.

Work on the home front is progressing fantastically. We finished installing a crushed red chip path in our backyard, have painted and stained the bannister upstairs and other much needed tasks. I'm actually really glad that I said yes to the West Wash Park Home Tour, because we're getting so many things done around the house which we'll actually be able to enjoy while we live here! What a concept...

Enjoy the long weekend,

~Cynthia

Blog
Website

Sunday 3 June 2007

Trimming, trimming and more trimming!

I usually try to post every other day; however, I had to deviate this weekend because I've been so busy trying to get as much made for the Summer Art Market next weekend. I'm really pushing the envelope and will most likely have my last glaze fire on Friday so that I can have some fresh work for Sunday.

On Thursday and Friday, I threw quite a few pieces and continue to handform work everyday. Yesterday, I trimmed all of my work and since I didn't have any photographs of finished work I thought I'd share the trimming process with you. Most of the items that I throw on the wheel have a foot. In fact, I insist on it for the most part. It feels more finished. In fact, if you pick up any ceramic pieces in your own home, you'll notice that there is a foot, or small raised lip on the bottom of your plate, cup, bowl etc. For me, it's an aesthetic decision. Some people don't add feet, and that's perfectly okay too.

A woman who I met at the Art Student's league, throws work and then alters most of it, making a foot nearly impossible to put on an asymetrical mug or bowl.

Yesterday afternoon, my family tore me away from my studio and we took a jaunt downtown to check out the Capitol Hill People's Fair. It's a 2 day event and downtown Civic Center Park is blocked off to all traffic. There's tons of live music, food & drink and arts and crafts for sale. I think they have 250+ vendors. I went specifically to check out the potters and other artists to see if it's an event I might like to apply to next year. I talked with one ceramic artist and asked about his experience, and he didn't really recommend it for pottery. He told me his sales had been declining year after year and he had participated at the fair for the past 7 years. He did give me the name of some other out door venues that he thought were better suited. One in Boulder and one in Manitou Springs - so I'm going to check into those events.

Oh, by the way, I tried a new technique trimming my pots after watching a pottery video the other night by Henry Mead. He used a jar cap to help trim his ware. The funny thing, is I had just seen an ad in a ceramic's magazine for a trimming tool that basically did the same thing! I do have plenty of jar caps available...

Well, I had better head out to the studio now,

Tuesday 13 March 2007

Sgraffito


Wheel thrown clay cylinder with sgraffito decoration


Wheel thrown clay cylinder with design painted in shellac

My ceramics instructor at the Art Student's League asked everyone to try some new surface decoration treatments on our wheel thrown pots. I think it's a great exercise and will hopefully give me some ideas for new work. (Thanks M.C.!) Our task was to throw 4 cylinders and then apply a different technique to each one. The first one involved painting on a colored slip and employing a method called sgraffito, which comes from the Italian word sgraffire or to scratch. It is commonly used in ceramic arts but can also be used in 2d work. Paint on 1 color, let it dry and then paint another over the top and use a sharp point (or other end of the paint brush) to draw back into the paint. With clay, colored slip is applied and then scratched or carved back into the form.

The second technique I am doing is to paint my design using shellac. I am going to carve away the unpainted part of the clay, so that the shellac painting will remain raised (the shellac will burn off during the bisque fire). We are also going to do some glaze stamping and cold surface glazing. Cold surface glazing is when color is applied but not fired in a kiln. You can use shoe polish, paint (oil, watercolor and acrylic), gold leaf, ink, wax, you name it-the sky is the limit.

I'm super excited! Last week, I applied for a tax ID and am ready to go on that front business wise. I used it today when I visited Mile Hi Ceramics and purchased a new Aim 88T Test Kiln for firing my pendants and other clay derived jewelry and I also purchased some raw materials. I will be test firing my kiln this week and will hopefully have a batch of pendants ready to fire this weekend.

I just signed up for another FREE tele-seminar with Art Biz Coach, Alyson Stanfield and Katherine Weber, author of Red Lotus Letter. The tele-seminar is titled How To Energize Your Art Career with Feng Shui. The seminar promises to introduce the listeners to the prinicples of Feng Shui and how proper studio organization can influence your energy and momentum. I figure, what the heck...I'm converting my garage into my studio space and I can use all the help that I can get!
I should probably mention that the tele-seminar is open to the first 250 people who sign up and takes place Wed. March 21st at 8PM EDT.

Wednesday 13 December 2006

Gustav Klimt's The Kiss Re-interpreted


Painted Background Fabric


The beginning of the painting


Finshed Painting

Click on the image to see the detail
Finished Quilted Fabric Postcard

Whew...I really procrastinated on this one, and I'm not sure why. I think, I was challenged by how I was going to do this one, so I stalled. Once, I started painting, however, I liked how the progress was coming along. And, now that it's sitting here in front of me, I really like the outcome, if I may say so myself!

It's not an exact replica, but close enough. This is 4.3 x 6 inches, painted, quilted and assembled into a fabric postcard.

I have to run to my daughter's swim lessons right now, so this will have to be it for this afternoon.

Dec. 14th update: Since I didn't have enough time to write much yesterday, I decided to add a little more to the post...mainly background info on Klimt. He was 1 of 7 children born to a poor family in Austria. He attended Vienna School of Arts and Crafts from 1879-1883 and was an early member of the the Austrian Symbolist group which was an off shoot of the Romantics (think Casper David Friedrich, John Henry Fuseli. Other symbolists include Odilon Redon, Puvais de Chavannes and Edvard Munch.

Klimt was publicly criticized for his almost pornographic and sensuous paintings. While not pornographic in a modern sense, the phallic symbol is alive and well in a lot of his work...just look at The Kiss, it's there!

His drew inspiration from ancient Greek, Minoan and Byzantine art work and engravings by Alrecht Durer. After reading this, I ticked off a number of my own favorite artists, Redon, Friedrich and Munch. And, Durer is the bomb when it comes to printmaking! I think I have to pull out my 19th C Art History book after I sign off!

After I made this mini replica, I must have stared at it for at least 30 minutes or longer. The figures merge, yet they are dileneated by the patterns on their clothing, he has large geometric masculine shapes in black, gold, white, copper and she has smaller round shapes in all of the above colors with the addition of red, blue, and green. I might not have noticed if I hadn't studied the painting and painted a copy. It got me thinking about shapes, colors and the idea of frequencies. I'm going to explore that theme in more detail on a larger scale in my own work!

Tuesday 29 August 2006

Bird Heart Quilted ACEO #2


Bird Heart Quilted ACEO #2
Originally uploaded by cmg art.
I am really having a lot of fun with this new medium! Right now, it just seems as if the possibilites are endless! I need to get to the fabric store...STAT.

This went a little faster than yesterday's, though I had a few more technical problems that I hope to have resolved or at least work on for my next few textile works.

ACEO (art cards editions and originals) sized, 3.5 x 2.5 inches. Fabric, beads, applique, embroidery floss, thread and wire hanger.


Bidding starts at .99.